
The combination of wood and epoxy resin can create a whole range of absolutely stunning design products and pieces of furniture that directly call for attention and praise from the surroundings. But working with wood, just like working with epoxy resin, requires proper handling if the result is to be worth it. This article will outline what you should know if you want to incorporate wood into your epoxy casting.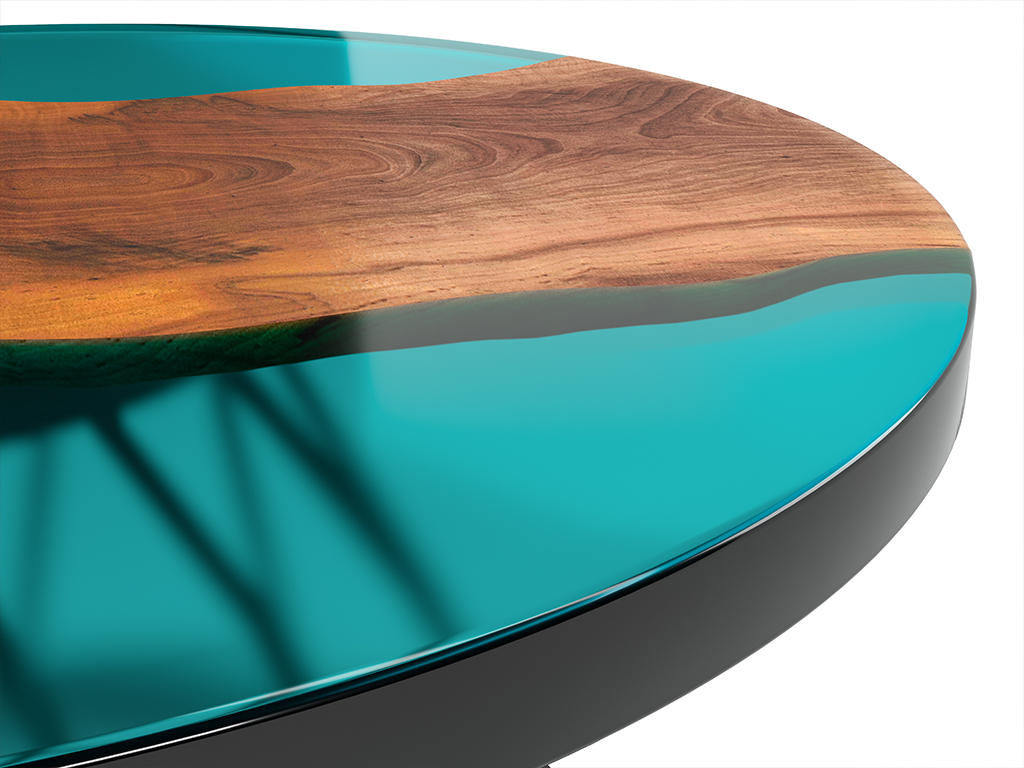
Wood and epoxy resin – a great pair!
When wood goes on a date with epoxy, it can create a really harmonious pair (perhaps a bit questionable). And it's up to you how you perceive this meeting - if you want to highlight the beauty of wood with a clear epoxy resin, which will make the grain of the wood stand out, or color the epoxy with pigments and give the work a touch of originality.
At the same time, you can create anything – from popular tables with an epoxy river to cutting and serving boards, clocks, coasters to jewelry.
For some such projects, it is an advantage if you already have some experience with wood, for others – more complicated and demanding, usually larger projects – you need to know what you are doing and what you want to achieve, in order not to waste energy and expensive materials unnecessarily.
How to choose wood for your project
We like to say that the "uglier" the wood is, the more expensive and valuable it is. So-called tree tumors, rotten parts, signs of insect attack and other defects make the given piece of wood even more unique and interesting to look at. So why not elevate it to a true piece of art? In normal practice, however, you will most often encounter the use of quite ordinary boards and planks.
It is probably no surprise that when choosing, you should think mainly about the practical and purposeful side of the matter and only then let yourself be influenced by the visual of the wood. But that doesn't mean you can't base your creation on the perfect piece of wood.
For a successful project, it is not so important what kind of tree the wood is from, but how big the piece is, how strong it is and what it is. Plinths, boards, cakes, sets for epoxy tables, blanks for clocks or prisms for jewelry... That's what we're talking about!
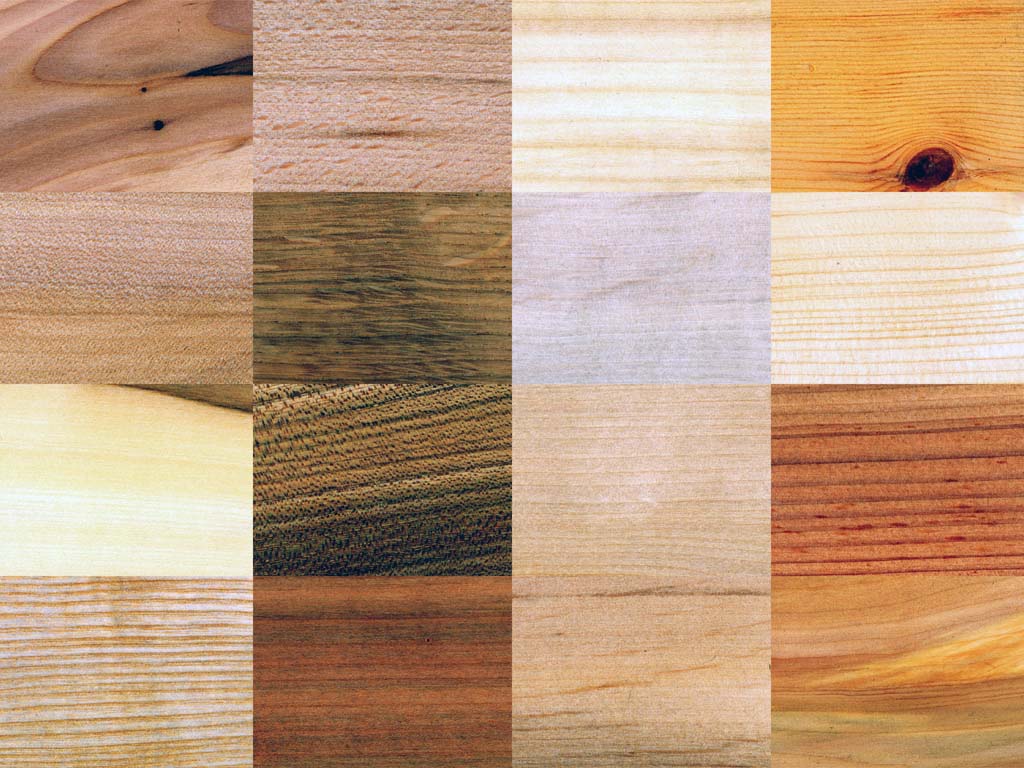
And once you know roughly what you want, here comes the fun part – will it be dark walnut, light oak, acacia, maple, ash or something else?
The ideal wood for epoxy creation is therefore a very subjective choice. But we have one piece of advice for you – it's better to start with smaller pieces and products before you start making big tables. Even a single kitchen cutting board will take a lot of work at first.
Preparation of wood before casting
When it comes to casting epoxy resin, it's not as simple as grabbing the first piece of wood you see on the side of the road while walking through the woods and pouring it at home.
The wood should not have a moisture content higher than 12 % before joining with the resin, otherwise there is a risk of possible deformation of the casting due to moisture and increased stress in the wood. Also, before you start casting, the board needs to be leveled, cleaned, sanded (80-120 grit) and thoroughly dusted.
If you do not have the space and tools for such preparation, it is better to buy wood from us.
All pieces are properly dried, with a moisture content of 8-10%, they are leveled on the CNC and sanded with a grit of 80. Basically, the wood is only ready to be inserted into the mold.
But before you epoxy it, there is one more necessary step…
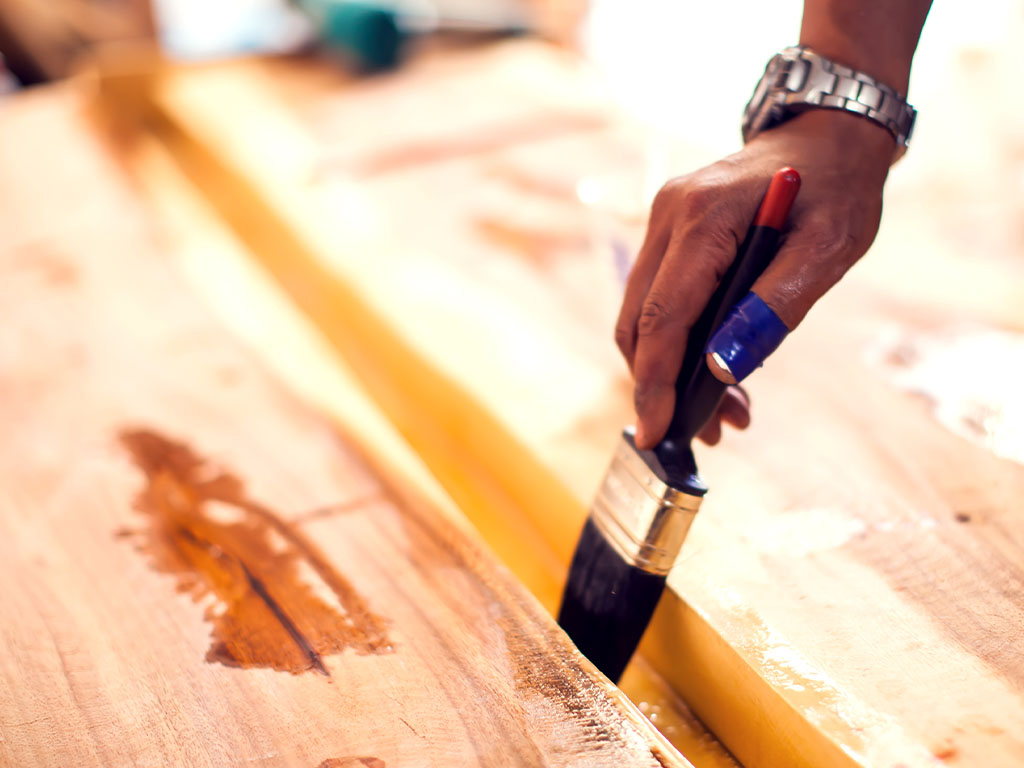
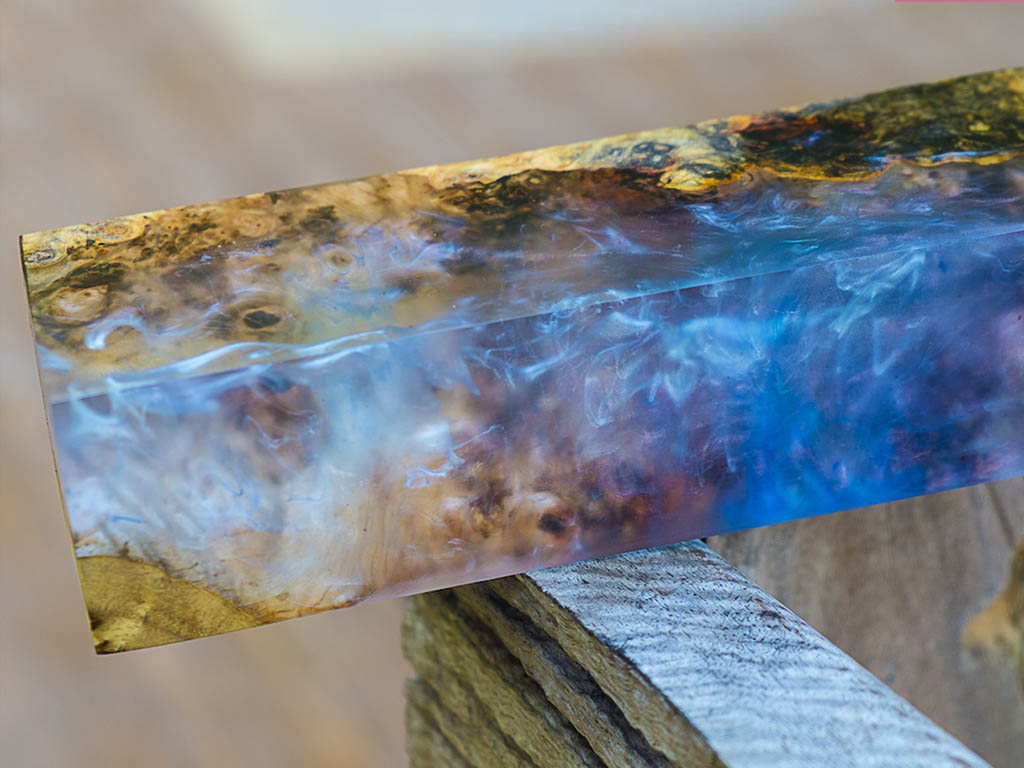
Penetration of the wood
Bubbles are every DIYer's worst enemy when casting resin. This is doubly true when working with wood, which is why it needs to be impregnated or sealed before casting. Wood is an absorbent material full of pores in which air is hidden. Without penetration, air will escape and create unwanted bubbles in the resin after being filled with wood epoxy.
To penetrate wood is used:
- Penetration resin – such as our Veropal PEN 10 – seals the porous surface quickly and reliably and is mainly used for penetrating thin woods, rotten parts of wood and bark.
- The resin with which it is cast is also used directly for penetration. The advantage is that the penetration goes deeper into the wood and thus increases the strength of the joint. The disadvantage is that these resins harden more slowly, and you have to wait for example 1-2 days before you can continue working.
- The stabilizing resin Veropal WSB E-LV goes even deeper, which is used especially for the already mentioned very degraded wood, bark, rotted parts and so on.
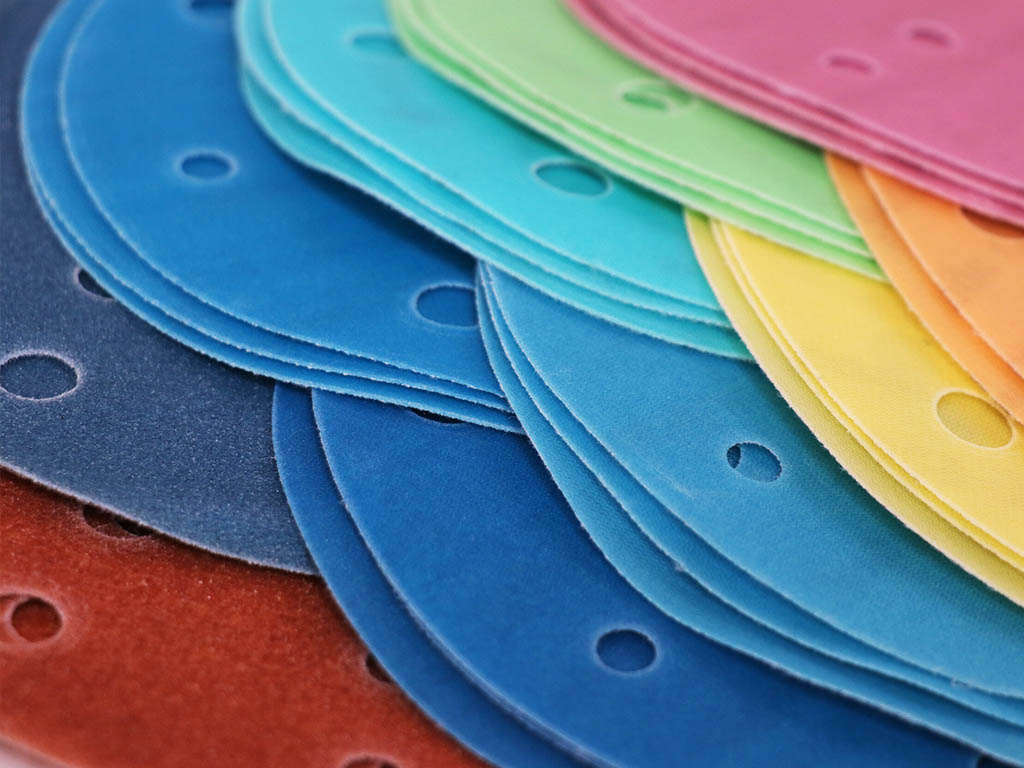
Working with wood, sanding and its treatment
After the product hardens and is removed from the mold, the epoxy must be sanded together with the wood, because even if you don't plan to change the shape of your product in any particular way, the epoxy often spills over in the mold where you don't want it.
We have already devoted an entire article to the issue of how to grind and polish epoxy resin and wood, so do not hesitate to dive into it if you desire a perfectly smooth surface.
Most of you will then be interested in working with wood, how to make a table from epoxy resin step by step.
Stabilization of the wood
A special chapter is the stabilization of wood. It is actually a process where all the air is sucked out of the wood using a vacuum and resin gets into the wood instead of the air. Wood impregnated with resin stabilizes after its complete hardening, increases its weight, is very resistant, hard and non-absorbent (regardless of the state in which it was before stabilization). In this way, the large majority of small pieces of wood that fit into the vacuum chamber are stabilized. It is mainly used for the butts of knives, cutlery, weapon handles, pool cues, jewelry, non-traditional and luxury pens and other products.
Degraded parts of the planks or larger pieces that do not fit into the vacuum chamber are then stabilized by repeated painting or pouring with the stabilizing epoxy resin Veropal WSB E-LV, which is very low-viscous and therefore very easily and deeply penetrates the wood structure.
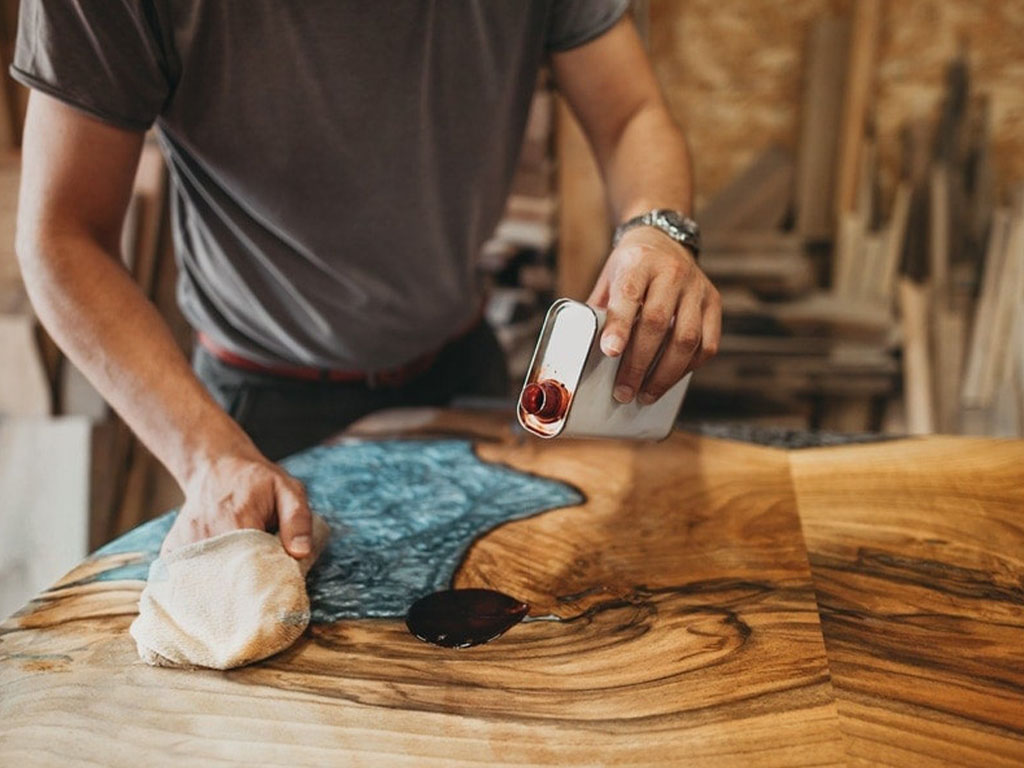
Surface treatment and maintenance of epoxy-wood products
As soon as it is polished, we move on to the final stage – treating the product so that it lasts for a long time, shines nicely and looks appropriate. After all, you must have spent a lot of time on it, so you (or anyone else) can also enjoy it for a while.
For the final finish, consider again what your project is designed for – do you need it to be scratch resistant, will it come into contact with food or stand in a place where the sun shines all day?
Of course, there are more of those options, so don't be afraid to consult us when choosing, but always choose quality products, and you can definitely take a look at the article How to protect wood while preserving its original appearance.
We are online on Facebook and Instagram, and you will learn the most at one of our workshops. Good luck with your creation!