
Materials for a mold
You can make a mold for casting epoxy resin from various materials – from steel, plastic (e.g. polypropylene, polyethylene, polycarbonate, etc.), wood, MDF boards, laminate, silicone, glass or plexiglass, etc.
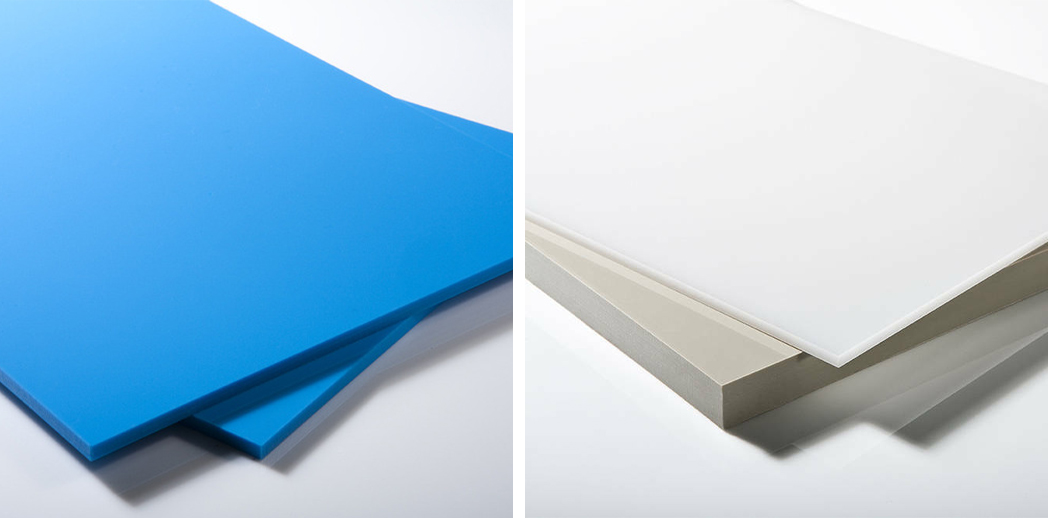
Polypropylene (PP)
The best material is polypropylene, because it does not require the use of a separator or separation tape – epoxy resins do not adhere to it (so does silicone, but silicone molds are not used for tables widely). Polypropylene (PP) is relatively expensive – about 3-4 EUR per 1 mm board thickness and 1 m2 surface area (depends on suppliers). Prooved suppliers of these materials are Omniplast or Multiplast. If you plan to cast repeatedly, the investment in this mold material is definitely worth it, at least as material for the bottom of the mold. Regarding the thickness of the PP board, thicknesses from 2 mm to 10 mm are commonly used. PP with a thickness of 2-4 mm is used via sticking to other mold materials such as laminate, and as material for the bottom of the mold (the sides are then made of cheaper and dimensionally more variable wood, laminate, etc.). In the case of this thin PP plate as the bottom of the mold, removal of the casting is easier. Thanks to its flexibility, the casting with the mold is pushed over the edge of the table when removed, and by pressing the PP plate downwards towards the floor, the casting is easily removed. All-polypropylene molds make the casting work very easy, you don't have to think about separators, etc. In the e-shop, we also have ready-made molds made of polypropylene, which are designed for repeated use (or, in case of serious interest, a custom-made mold can be made).
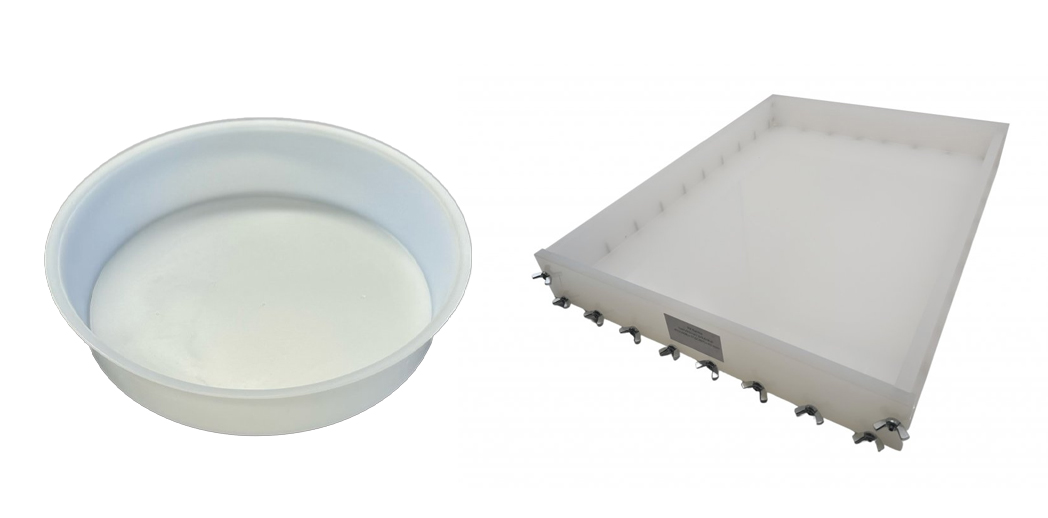
In the e-shop, we already have ready-made forms made of polypropylene, which are intended for repeated use, see: Separators and Molds. We also offer the possibility of producing PP molds according to your ideas and dimensions.
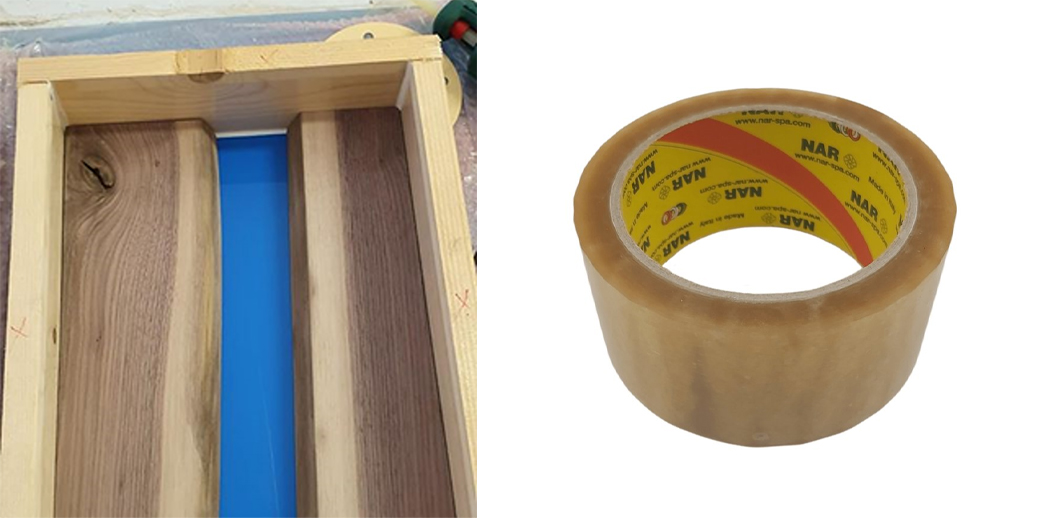
If you do not want to use polypropylene for the mold, wooden boards or laminate are most often used. However, these materials must be treated with a separator or separating polypropylene tapes during mold preparation. For wood as material for the form, we first sand the wooden boards (grit P80 or P100). The trick is to get rid of the protruding fibers so that the wood is not "hairy" and the separation tape holds well. The tape must adhere perfectly to the wood, because if it does not adhere and the resin gets into the wood of the mold, it will act as glue. We always choose the dimensions of the mold at least 1 cm larger than the dimension of casting. We choose a larger size so that the wood fits well into the mold, and we also have to take into account that 5 mm will have to be cut from each side when removing the mold for a better appearance of the edges.
Completion of a mold
After cleaning the side of the plates that will be inside the mold, we have to decide how to separate the casting from the mold. We basically have two options, either to use a chemical separator (based on wax, Teflon, siloxanes, etc.) or to use a polypropylene separation adhesive tape.
Mold with polypropylene separation tape
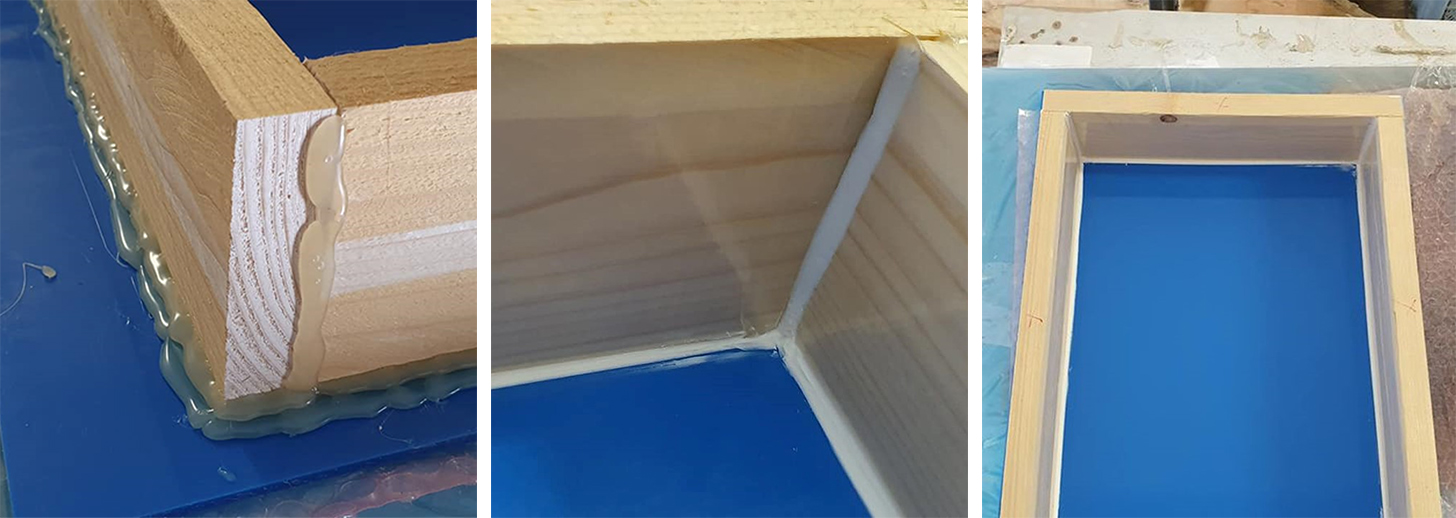
Polypropylene separates well, but polyethylene tapes are not safe enough in ensuring of goon insulation of mold due to many edges. Use of printed separation tapes is risky even if the print is of high quality and has a top layer over the print – the print is stuck to the casting (but it can be sanded off). When using separation tape, the inside of the mold is covered with polypropylene adhesive tape, both the bottom and the sides. The individual strips are laid next to each other on the bottom with an overlap of at least 5 mm (after removing, these overlaps will stick to the bottom of the casting and will be visible, but could be sanded off). For side panels, the first strip is placed on the bottom edge of the side panel along its entire length with a slight overlap, then the entire side panel is taped with a slight overlap, mainly the inner part that will be in contact with the epoxy. On the outer part of the side, the separation tape will help to prevent the hot-melt adhesive from being absorbed into the wood and thus to better remove it from the side after demolding. Then the form will be assembled. First, the individual side panels are glued together in the corners with a hot melt gun and a frame is made from them. A continuous bead of silicone or acrylic sealant is then applied to the bottom of the frame, and the frame is pressed to the bottom of the mold with this sealant. Subsequently, with a hot melt gun, we apply hot melt glue from the outside of the sides around the perimeter of the contact between the sides and the bottom of the mold. The hot melt glue prevents the mold from leaking, and the solidified one comes off very well when the mold is taken apart. Once we have it, we apply another layer on top of the layer just applied and then one more layer, but this one is placed more next to the first layer with a half overlap with the first layer. It is done in 3 layers because one layer is not enough in most cases and leaks. It is better to use up a few extra fusible rods than if the resin starts to flow through the mold, and you find it leaking on the ground. At the same time, from the outside, we also go through the individual joints between the sides with hot-melt glue (but only from the outside). To close the internal contact surfaces, we use silicone or acrylic sealant (use white rather than transparent, it is easier to see where you have already applied and where not, and you can also see any holes, etc.), with which all the internal contact surfaces of the bottom and sides or sides putty well and smooth. After that, it is necessary to let the silicone sealant or acrylic cure, which in most cases takes about 1 day.
Mold with chemical separator
If you do not want to use polypropylene separation tape, chemical separators can be used to create a separation layer, most often based on wax, siloxane, oil, Teflon, etc. These separators are applied directly to an already assembled form (whether assembled similarly as described above, or screwed together). The separator is applied with a brush or cloth on non-absorbent surfaces (laminate, hardwood, steel, glass...). After its application, a continuous microlayer forms, which will separate from the mold after the epoxy has hardened. Separators are applied only on surfaces where the epoxy will be in contact with the mold. Work carefully and in the entire necessary area, because the epoxy acts as an adhesive and the unseparated part will be firmly attached to it. The most widely used separators are wax-based. Our separator V11 applies and dries relatively quickly and creates a high-quality separation microlayer of white wax. Do not touch the surface after application, as you could break the continuous layer of wax and the resin could adhere. It is important to always shake these wax separators in the bottle before application, because present wax settles to the bottom.
Veropal RA 100 shows even better separation effects. It is an industrial separator based on siloxanes, which is used on a large scale, for example, when casting large transformers or insulators for power plants. We prepared it in a spray for easier application. But when using it, be very careful about the applied amount. If too much separator is applied to the mold, and you pour the epoxide into the mold, the excess release agent will rise to the surface of the casting and create a greasy layer. Excess oil can shrink as if poured into the corners of the resin in the mold, creating such oil pockets. After the casting hardens, the oil will release, but you will be left with that empty pocket in the casting. Therefore, it is always important to take a paper towel after spraying Veropal RA 100 and spread the droplets on the surface to a continuous, slightly oily film forms on the surface of the mold.
Be very careful when assembling the mold and ensuring the separation, it will prevent leakage (resin on the ground + mess + complicated demolding in case of curing). These casting resins are very fluid and tend to find their way through even just micro-cracks, especially in the early stages of casting. Over time, as epoxy bonds form and the polymer crosslinks, the resin thickens and leakage is less risky. It often happens that, even with experienced people working in the field for years. Therefore, care is always necessary.